Creating a Quick Report to show the class No Photo list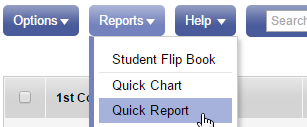
- Click on your Student tab.
- Click Reports
- Choose Quick Report.
This will bring up a pop-up for you to start making choices.
5. Choose New Report
6. Keep it on Simple
Then in the left box (Available Fields), you will be prompted to add the resources you would like to add to your report.
If you click the A/Z box, it will alphabetize the choices for you.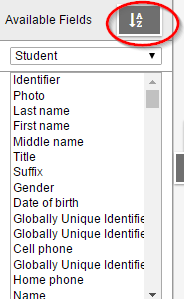
7. Scroll down to choose PHOTO RELEASE
8. Click the  button.
9. Choose First name, Last name...any other information you would like to add to your report, and click the ADD button again.
If there is anything in the box on the right (Selected Fields) that you do NOT want, choose it and click the REMOVE button.
By using the UP and DOWN buttons, you can place your selections in the order you want them to appear in your report.
10. Once your Selected Fields box shows all the information you would like, click Next.
Now in the Selected Fields box, it will show how your report will be organized (most likely by name) Click Next, and Next again. This will bring you to the Quick Report: Format Options Page. The default is webpage. You could also choose csv file if you prefer.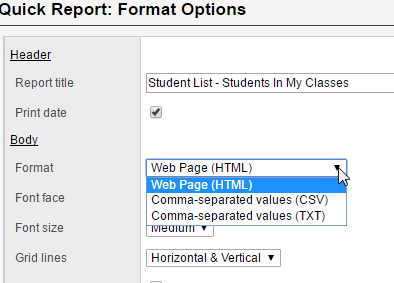
11. For a quick check, you could click FINISH, and then view your report.
12. If you would like to save this report in Aspen, click NEXT again until you get to the Quick Report: Save Options page.
13. Name your Report. Click FINISH.
No comments:
Post a Comment
Do you have any further questions or a suggestion for a later blog?