How to Enter Quarter Grades in Aspen
Your Aspen gradebook is similar to the paper gradebook that we all used to use.
It’s a private document that only you can see. At the end of each quarter,
your student grades and comments must be posted to make them visible to
the school and district.
At the beginning of the school year, you should have set up your gradebook
details. The Details page allows you to create your average mode, set up
categories, and link classes. To learn more about setting up your gradebook
details, see my blog entry Setting up your gradebook in Aspen.
To Post your grades in Aspen Gradebook,
To Post your grades in Aspen Gradebook,

- Select your first class in your gradebook. Click on the Grade Columns dropdown and select Post Columns - Terms.
- The Aspen Posting columns will appear. These are
- Q1Grd - Quarter 1 Grade
- Q1ClsAbs - Quarter 1 Class Absences
- Q1Com1 and Q1Com2 - Quarter Comment 1 and Comment 2 field
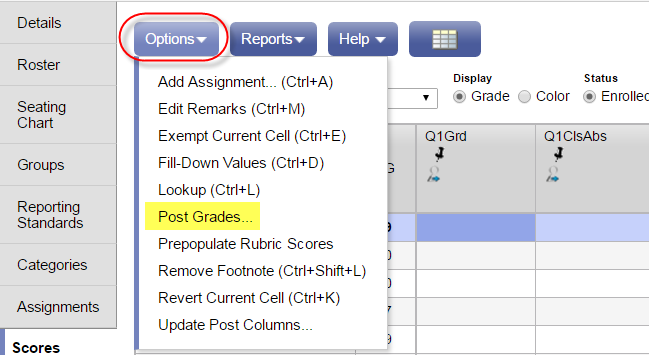
- Select Options -> Update Post Columns


- This will take you through the Update Post Columns wizard.
Step 1. Select the Grade Term (Q1) and the Grades to update (all students).
- Click Next
- Step 2. Select
- Quarter 1 Grade = Average:Q1
- Q1 Class Absence= Class Absence Total
- Click Next

- Step 3. Confirms the choices made in Step 1 and Step 2.
- Click Finish

- The Q1Grd (Q1 grade) and Q1ClsAbs (Q1 Class Absense) fields should now be populated. The Q1 total field from your gradebook has been copied to the Q1Grd field.


Verifying your Grades
- Verify your grade in Q1Grd against the grade from your Gradebook which is labeled Q1.
- If you would like to change the grade, simply click on the grade in the Q1Grd field and change it. Grades that you have modified will be indicated by a red, crossed-out circle.
- PASS/FAIL Courses If your class is being taken as a Pass/Field, you should change the Q1Grd field from a number to a P or a F. To change the entire column at once, add the P in the first students Q1Grd field and then click CTRL-D. Note the red, crossed-out circle next to the grade. This simply indicates that a modification to the grade was made by the teacher.

- In Aspen, apply the N-Rule using the comment fields
- 100 N-Rule: May lose credit for course due to to attendance issues. Contact school administration.
- 101 N-Rule: Loss of credit, due to attendance issues, under consideration. Contact school administration
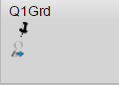 What does the pushpin mean?
 - If the pushpin is black ,
you can enter grades for this column, but you cannot post them to transcripts yet. - If the pushpin is green with a triangle
,
you can enter and post grades for this column. - If the pushpin is red with a square
,
you already posted the information to transcripts. If you need to change a grade, you will be able to repost your grade for 5 days after the report cards are distributed. After that, you will need to complete the grade change form (see Guidance department).
POSTING Grades
Once you have verified the grades, added comments, and applied the N-Rule if
necessary, you can Post your grades. Posting your grades sends a copy of the
grades in the field Q1Grd (and comments) to the report card / student transcript.
grades in the field Q1Grd (and comments) to the report card / student transcript.
- Once the posting period has opened, the pushpin will turn from black to green. The green signifies that you can post your grades.
- To Post your grades, click Option -> Post Grades
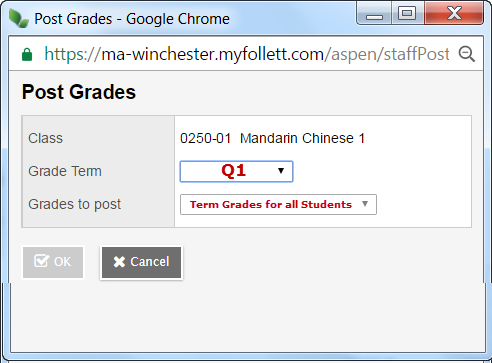
- The Post Grades pop-up will appear.
Fill in - Grade Term = Q1
- Grades to post = Term Grades for all Students.
- Click Ok
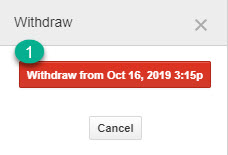
- Once your grades are posted, your push pin will change from green to red.
- **IMPORTANT ** You must Post Grades for each class individually.
FAQs
- You may re-post your grades as many times as you please until the posting period ends.
- There will be no printed verification sheets. Instead, you can verify your grades on the Post Columns page of your gradebook (see steps 9 and 10).
- Want a printable copy of this verification page?

- Select Reports -> Gradebook Sheet
- The Gradebook Sheet will appear.
- Click Run.
- The printable version of your Post Columns page of your gradebook will pop-up
- Select Printer icon at the top of the Gradebook Sheet page.
- If you planning on using the same comment field for most of the students in your class, you can quickly add the comment to all students by using Options -> Fill Down Values or CTRL-D. Then just change those students who need different comments.