 |
| Primary Calendar |
Secondary Calendars
 |
| Color Code your different calendars. |
For example, a high school teacher might want to create a calendar for each of his/her courses. On each course calendar, he/she might list homework, project due dates, exam dates, field trips, etc. He/She might also add links in the description to their web page, readings, etc. that will be helpful to their students. The teacher might want to make these pages available to the public as a whole, or only to students in the class.
This same teacher might be a club adviser creating a club calendar accessible to the public but give student officers edit access only to this calendar.
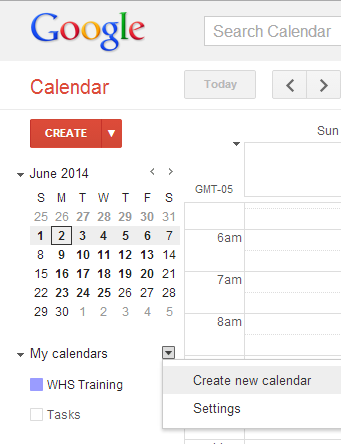 How do I create a new calendar?
Then select Create new calendar.
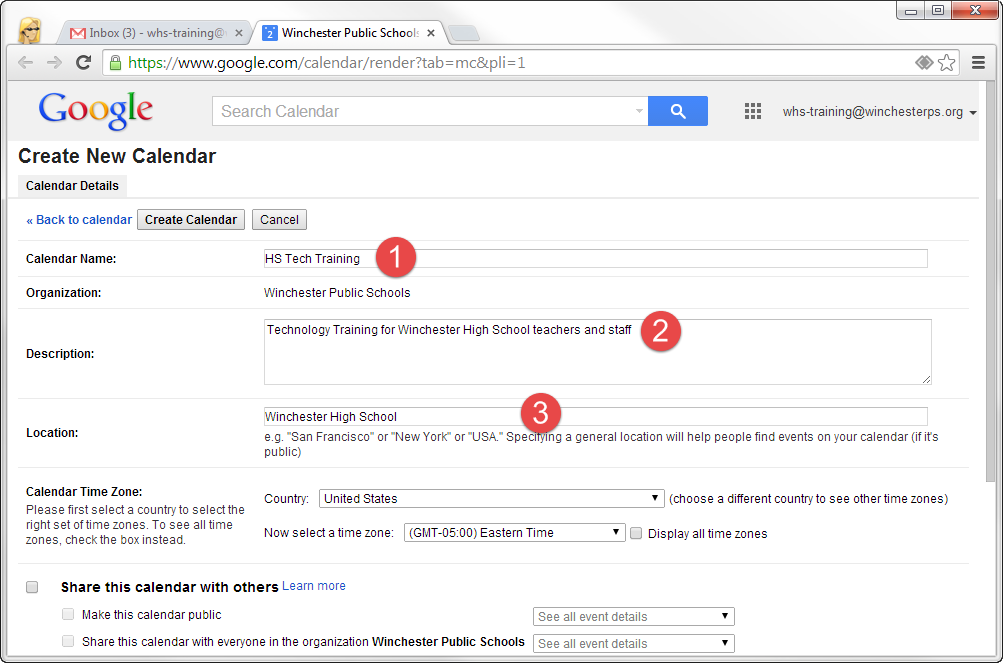
- Name your calendar
- Add a description of your calendar
- Set the location, in this example I set the location to Winchester High School.
- Share your calendar with others. By clicking this box, you can make the calendar public OR accessible only to other people
with a WinchesterPS.org email
address.

- Share with specific people. Use this area to share your calendar with specific people. For example, another teacher, middle school team, members of your department, or student officers in your club.
Choices for permissions include:
- Make changes AND manage sharing. This permission basically gives the collaborator ownership rights to your calendar.
- Make changes to events. Allows the collaborator to add and change events on your calendar. They cannot give others rights to your calendar.
- See all event details. Allows the collaborator full view-only access. They can see what is on your calendar but cannot add, change, or delete anything.
- See only free/busy (hide details). Here the viewer will only see whether or not you are available. You might use this on a calendar that you share with parents to let them know what days you are not available for extra help.
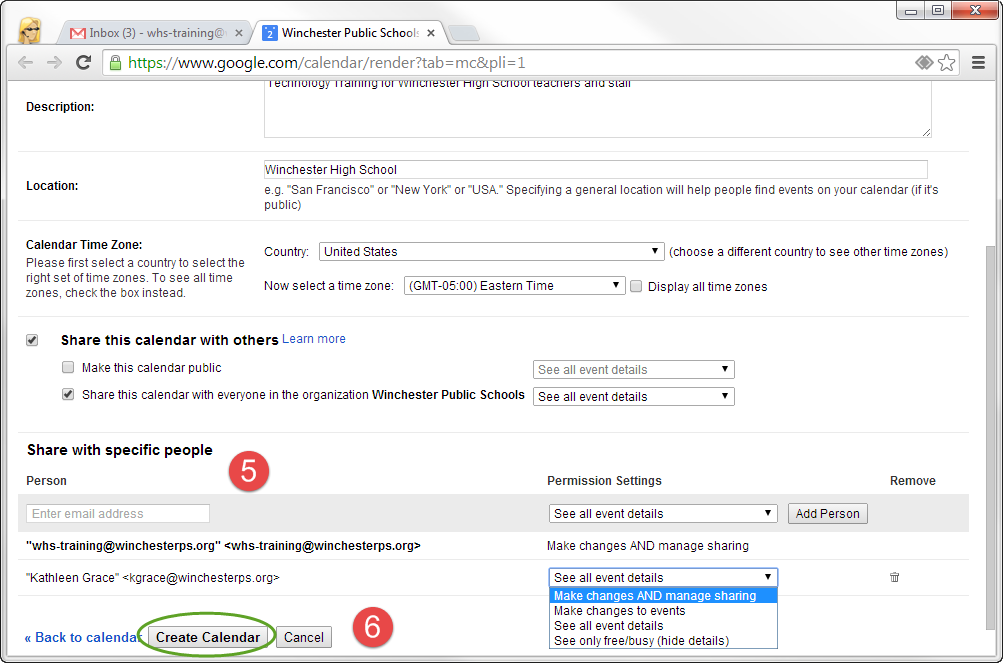
- When you are done, remember to click Create Calendar.

In my example, my HS Tech Training calendar is circled in green (right). It was created so that items added to the calendar would appear in green.
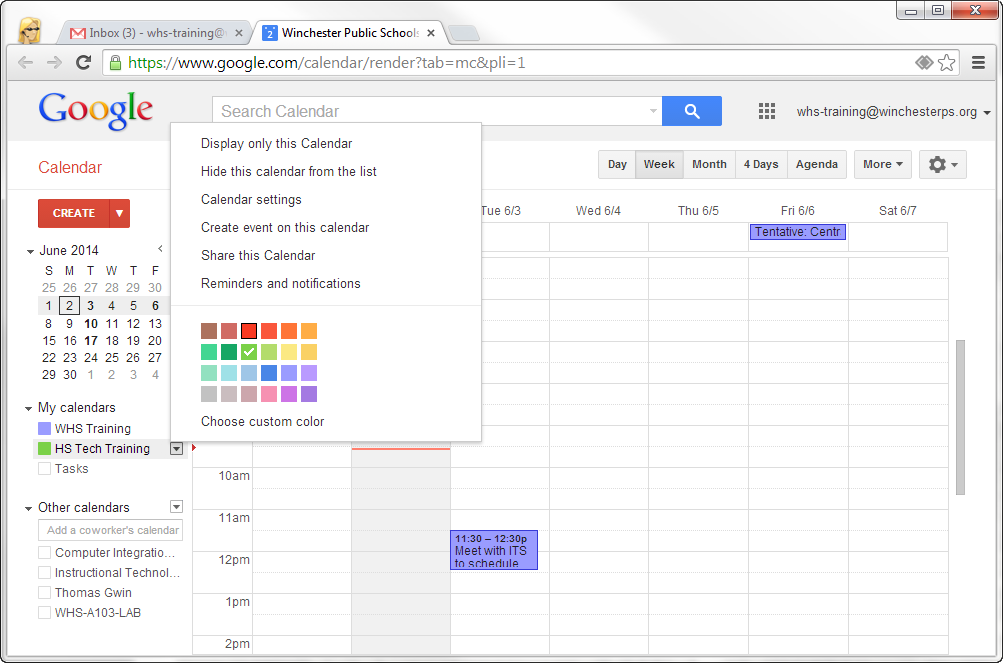
You are in control of the colors for which your events will be displayed on your calendar. So if I did not like the green color, I need only click the down arrow next to the calendar name and select a color that I prefer.
This down arrow also gives me access to change settings and sharing settings if I decide to later change them.
How to make a calendar not visible.
Finally, to turn calendars ON/OFF on your calendar view, simply click the calendar and it will toggle on or off.
Embedding Calendars on your web site
If you would like to embed your new calendar on your Google site, Wiki, or on Edline, checkout the blog entry How to embed multiple Google Calendars.
No comments:
Post a Comment
Do you have any further questions or a suggestion for a later blog?