Wednesday, May 28, 2014

Saving Your FirstClass Folders


If you have used FirstClass to store word processing, pdf's, or picture files, then you will need to save these files before July 1, 2014, or you will lose them.  

Saving these files are easy if you follow the steps below.

  1. Open FirstClass and select the folder of files that you would like to save.


  1. Select the file or files that you would like to save.
To save a single file,
click on the name of the file.
To save multiple files,  
select the first file and hold the SHIFT key to select many consecutive files.
To select non-consecutive files, hold the CTRL key and select the files.

  1. After selecting the files to save, select File >> Export.

  1. Save your FirstClass files into a folder on your hard drive.  It is suggested that you create a folder using Make New Folder, and name the folder using a naming convention similar to the one below --FirstClass+foldername.

  1. After you have selected the folder to save to, click OK.
     
  2. First class will export your files and store them in your folder.  When you see the screen below, select Open Folder to verify that your files were indeed exported.

Thursday, May 22, 2014

Moving your FirstClass Calendar to Google


This entry will take you through the steps necessary to move your FirstClass calendar to Google Calendar.

Please read through the steps carefully before beginning.

FirstClass


  1. Open FirstClass and select Calendar as marked 1 in the image right.* Note that selecting Calendar under the My Calendars  section will not work - only select Calendar as indicated by the number 1.
  1. In the FirstClass Menu, select File >> Export
  1. The Export Calendar pop-up window will appear (right).  In this window, you have three options for exporting your calendar.
    To export to Gmail, select  "For Use with Outlook (.csv)".
    Click on the OK button.
  1. In the next pop-up window,
     
    1. name your calendar
      (e.g.,
      KGrace-Calendar-0514)
       
    2. and click Save.


  1. The File Transfer:Completed window will appear.  When the transfer is completed click Close.

Google Calendar


  1. Using Chrome, sign into your Gmail account.
     
  2. To access your calendar, click on Google bar icon .  This icon, located in the top right corner of your screen (see red box in image below) allows you to easily switch between many of the Google Apps for Education products.

  1. Select Google Calendar by clicking on the Calendar icon.


  1. Once in the calendar, go to settings by selecting
     
    1. the gear in the top right of the screen
       
    2. Click on Settings

 
  1. On the Calendar Settings page,
     
    1. Select the Calendars tab
       
    2. Next, choose Import Calendar which can be found below the list of your calendars.


  1. Import your FirstClass calendar.
     
    1. Select the file that you just exported from FirstClass.
       
    2. Choose your Google Calendar for which you would like to import the calendar entries.
      For this example, I am importing my FirstClass calendar into my main Google calendar.
       
    3. Click Import.


  1. The Import calendar pop-up window will appear.  It will tell you how many events were processed and imported.  Click Close.


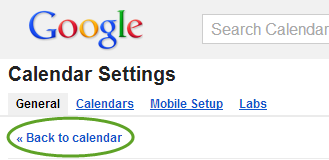
  1. After completing the import, click <<Back to calendar
    as shown below.

Tuesday, May 20, 2014

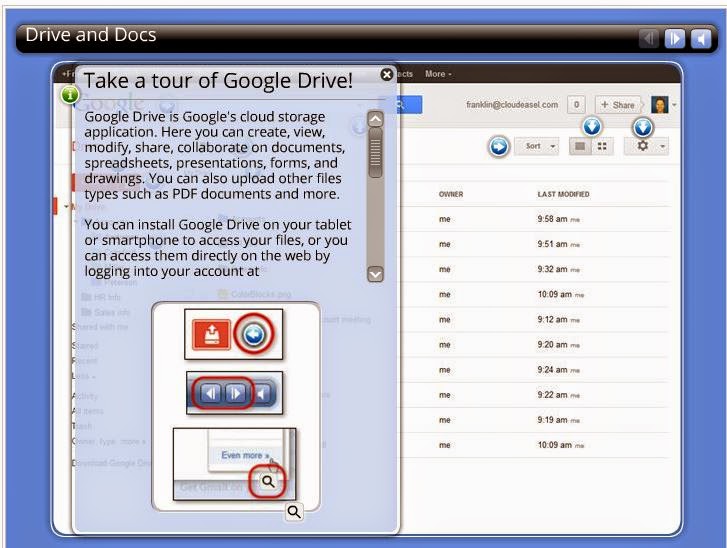
Tech Tip of the Week: Take an Interactive Tour of Google Drive

Are you a little confused about what is meant by Google Drive?

If you are, rest assured, you are not the only one.  

Google Drive is a cloud storage application that allows you to save and store files.  It is also an office suite of applications that allow you to create documents, spreadsheets, presentations, forms, and drawings.

If you would like to learn a little more about Google Drive, check out this Interactive Guide to Google Drive

Google Apps Documentation & Support
Interactive Tour of Google Drive

Friday, May 16, 2014

What is the difference between Google Apps for Education and a Gmail account?

Google Apps Google Apps for Education vs. Gmail.com
A few people have asked me about the difference between Google Apps For Education account (e.g., your gmail account ending with @winchesterps.org) and a personal Google account (e.g., gmail with @gmail.com) and I thought I would attempt to explain the difference.
Below is a chart of some of the major differences between Google Apps for Education and a personal Gmail account.

Google Apps for Education Gmail.com
No advertising Contains Advertising
Google Apps are powered by Google but administered by the school district.  The district can decide which apps are available to students and staff. All Google Apps are automatically turned on (e.g., Drive, Docs, Calendar, Groups, etc.)
30 GB email and Drive storage 15 GB email and Drive storage
Account belongs to a domain (winchesterps.org) allowing the school to
pre-populate contacts, groups, etc. and allows for an extra level of security (i.e. share only with members of winchesterps.org).
Stand alone account
Professional account
Use your winchesterps.org account for all school related emails and file sharing.
Personal account
Use a gmail.com account for personal email and personal file sharing.  

Information for this blog entry came from 

  • http://www.googleappsforedu.com/google-apps-vs-gmail-accounts/
  • https://support.google.com/accounts/answer/72709?hl=en

Monday, May 12, 2014

Adding Tasks to your Google Calendar

Google Calendar has a great feature on how to use Tasks.  These checklists help you to keep track of things that you need to do.  

Your tasks are available in gmail, on your calendar, and on your mobile device. You can associate a task with a particular day, helping you to manage your time. 

This short video takes only 5 minutes and shows you the basics of Google Tasks.  Check it out!


Tuesday, May 6, 2014

Google Sites: How to Embed a Google Calendar

  1. Go to the web page for which you would like to add your calendar and begin editing the page.
     
  2. Chose where you would like the Calendar to appear and then select
    Insert >> ... More gadgets...
     
  3. The Add a gadget to your page window will appear.
  4. Select the option for Google Calendar (see red box below).
     
     
  5. The Add a gadget to your page screen below will appear.  Click on the Select button to choose the gadget.

  6. You have the option of which calendar to display, the width and height of your calendar, whether or not to have a border, and the title of your calendar.
    The view options that you can choose include:
  7. Choose how your calendar will display.  Your choices are default or canvas. 

    Default Calendar                          


    Canvas Calendar
  8. When you are in edit mode, you will not actually see the calendar.  You will see a box marked as Google Gadget as shown below,

  9. After you save your edits, your calendar will appear like below: